How To Process Cassava Into Garri

This cassava processing guide will take you through every step you need to know on how to process cassava to garri.
You will find this article very helpful especially if you wish to make money from this area of the cassava farming business.
Follow this step-by-step guide to cassava processing and you will be well on your way to producing tasty garri.
Alright, let’s dive right into it.
What is Garri
Garri is a type of carbohydrate food that you get from processing raw cassava.
It is a major meal in many West African countries, especially Nigeria and the Igbo people in particular.
You can eat garri by soaking it in cold water with sugar or honey.
To make the food very rich, you can add milk, coconut, palm kernel nuts, dry fish, groundnuts, or porridge beans (cowpea).
Another way to eat garri is by making pasta with it and eating it with a delicious soup like egusi soup, okra soup, vegetable soup, etc.
What is the shelf life of garri?
The way you process your garri and how you store it can affect how long it will stay on the shelf.
When you process cassava properly you can store it for up to six months or more.
Fry or Roast your garri properly to reduce its moisture content which is usually the main cause of spoilage.
To make your garri have a longer shelf-life you must properly dry it to lower moisture content level using airtight plastic buckets.
Do not store garri in a moist environment or leave them open in areas with high humidity.
If you do this, your garri will begin to develop molds and spoil.
Package your garri properly in sacks and store them in a cool dry place.
Cassava Processing into Garri
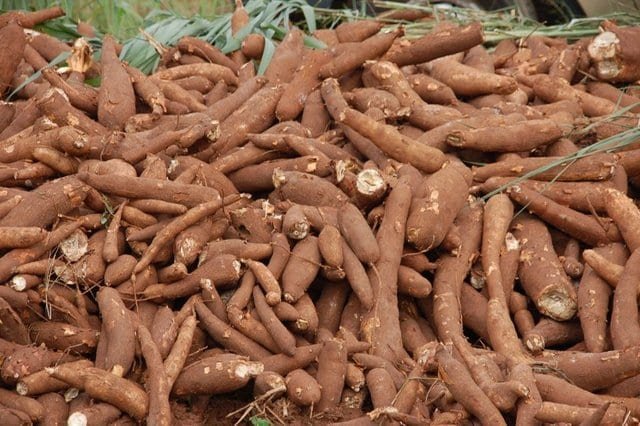
Of course, you already know that you first need to harvest the quantity of cassava that you will use to produce garri.
In processing cassava into garri, the raw cassava must undergo a series of processing steps.
The cassava processing steps include the following;
- Harvest and sort your cassava to get the best
- Peel the cassava roots
- Wash and clean the cassava root
- Grate the cassava roots into a mash
- Ferment the Cassava Mash to Remove Hydrocyanic Acid
- Press the cassava sack to drain the water in the garri
- After draining the garri mash, sift the wet cake into grits
- Fry or roast the grits to form edible garri
- Spread the garri in a thin layer and allow it to cool
- Sieve or grind the garri to break larger granules
- Pack the garri in airtight bags and store them properly
The essence of subjecting your cassava to all these processes is to remove the hydrogen cyanide in cassava and produce the desirable flavors.
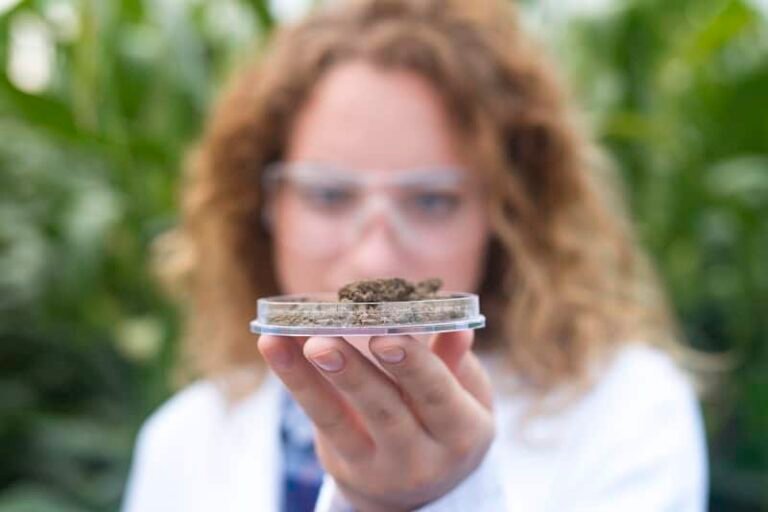
This research by researchers at Ohio State University shows that the proper processing of cassava – drying, soaking in water, rinsing, or baking effectively reduces cassava’s cyanogen content.
Frying or roasting (whichever word you prefer) the garri will drive off cyanide gas and destroy enzymes and microorganisms.
This will make the garri dry, and fit for immediate consumption, and the product will have a longer shelf life.
The end product is creamy-white or light-yellowish granular flour with a slightly sour flavor.
Some people add palm oil to their garri to give it a yellowish color. However, this is dependent on your taste.
How to process cassava into garri
Step 1: Harvest and sort your cassava to get the best
This is the last step in cassava farming and the first step in the process of garri production.
After harvesting your cassava from the farm, select only healthy whole roots that are appropriate for producing garri.
Because there is a need to select healthy cassava tubers, you need to sort your roots and pick the best ones.
After the sorting, transport the tubers to the cassava processing plant.
Step 2: Peel the Cassava Roots
When you reach the cassava processing plant, peel the cassava root using a knife.
You can also peel the roots before taking them to the cassava processing plant, especially if the processing plant has a good waste disposal system.
Some processing plants have complete cassava processing machines including peelers which you can use to peel larger quantities of cassava.
Step 3: Wash and clean the cassava root
Wash the fresh cassava roots in clean water to remove excess mud and sand.
Use a clean sponge or scourer to wash the cassava clean, removing extra peel, spots, or dirt.
There is a special garri processing machine for this step too.
This step of Garri processing is very important so that the quality of the final Garri is without sand.
Step 4: Grate the Cassava Roots into Mash
The need to grate cassava roots into mash is to remove some cyanide from the roots in the process.
In ancient times, people use a rough metal sheet to grate the cassava by hand. They usually sustain severe injuries on their fingers.
Nowadays, there is more efficient cassava processing machinery which is safer and easier to operate.
There are also many locally fabricated garri processing machinery in Nigeria that you can get at an affordable price. However, the grating machine must be one with a stainless steel grating drum.
If you use a grater that is in any way less than stainless steel, you may be risking introducing rust and contaminating your product.
To grate the cassava using cassava grating machinery, load the roots carefully onto the engine while it is running to grate it into a mash.
Collect the mash from the output port of the machinery into a clean bowl.
The next step is to pour it into a clean polythene sack and allow it to ferment and drain.

Warning!!!
NEVER Ever try to use your hands to force the roots deeper into the grater while it is still running!
OMG! I can’t imagine the gravity of injury you will sustain if the machine mistakenly grabs your hand.
Step 5: Ferment the Cassava Mash to Remove Hydrocyanic Acid
The essence of fermenting the cassava mash is to get rid of the hydrocyanic acid (HCN) which is natural in cassava tubers.
You must control the fermentation process properly because if you leave it to ferment for a very short period, it will result in incomplete detoxification and a bland product.
If you leave the cassava mash to ferment for too long a period, it will give the product a strong sour taste.
So, both over-fermentation and under-fermentation of garri will greatly affect the texture of the final gari.
How to Ferment Cassava mash in cassava processing
- Collect the cassava slurry into a clean polythene sack.
- Tie the sack using a very strong chord
- Arrange the sack of cassava slurry in the fermentation rack.
- Allow it to stay for one or more days to ferment
- While waiting for the garri to ferment enough, prepare the press for pressing.
Step 6: Press the cassava sack to drain the water in the garri
Before going into sifting and frying the garri, you need to drain the water completely.
You know you can’t achieve that by squeezing the bag of garri with your hands.
So, you have to Load the bags directly onto a hydraulic press and tighten them very well.
Some people, especially those in rural areas, use wood and strong chords to tie the bag of garri. Some, place a heavy stone on the bag of garri to increase the pressure.
This is a very slow and unhygienic method of draining water from your garri. It is not a good method for a commercial garri producer.
The key thing to note in this step is to find the perfect moisture balance for the garri.
If after pressing the garri mash it is too wet, it will get lumpy during roasting. Also, if it is too dry, it will be too floury and dustlike.
How to know that the garri is ready for frying is that it will form a firm wet cake inside the bag.
Another way is when no more water comes out of the bag, it means that the garri is ready for the next step.
You will need to break it apart so that it comes out in smaller blocks which you can crush with your hands for sifting.
Step 7: After draining the garri mash, sift the wet cake into grits
In this step, all you have to do is to take out the wet garri cake and break it down with your hands.
What you will have will be grits of garri. Using a sifter, sift the garri grits to remove the lumps and fibrous roots it contains.
The aim is to obtain a high-quality product with uniform-size granules.

Step 8: Fry or roast the grits to form edible garri
To fry the garri, gently spread some quantity of the grits into a frying pan or a garri fryer made of stainless steel material.
A garri fryer can make use of electricity, natural gas, firewood, or charcoal as the heat source.
Whatever the source of heat is does not matter, what matters is the consistency of the temperature.
Use a temperature of 80 ºC/175 ºF to fry the garri until it is okay for removal.
If you use lower temperatures, the product will simply dry up slowly and produce a dry white powder.
Also, if the temperature is too high, it will result in the charring of the product and it will make it stick to the roasting pan.
One thing you must do is always stir the garri until it is ready for evacuation from the fryer.
Doing this will make the heat spread uniformly throughout the garri roasting process.
You can also use an air fryer for this process.
How to know that your garri is ready after roasting?
- Scoop a little quantity of the garri out of the fryer
- Let the hot garri cool down a little
- Handle it with your hand and judge; if it is dry and crispy, then it is ready for evacuation, otherwise, continue frying.
When the garri finally gets the right texture, scoop everything out of the fryer and repeat the process of frying another quantity of garri until you finish everything.

Step 9: Spread the garri in a thin layer and allow it to cool
After roasting the garri, spread it in a thin layer on a platform that is higher than ground level and allow it to cool.
The reason for spreading the garri on a high platform is to prevent sand from entering it.
Also, when you are cooling your garri, make sure the environment does not have high humidity.
Garri is hygroscopic, meaning it absorbs moisture from the air.
As a result, you must ensure that the humidity of the environment is conducive and dry enough for the garri.
Step 10: Sieve or grind the garri to break larger granules
As soon as the garri becomes cool enough, use a sieve to remove the larger granules in the product.
Alternatively, you can use a grinder to break down the larger granules into smaller ones.
Some people just pack everything the way it is.
In fact, a woman once told me that if you make eba (garri pasta) it rises better when it has granules.
There’s no justification for her claim anyway. If it’s true, please share it in the comment. Thanks.
Step 11: Pack the garri in airtight bags and store them properly
You have come to the final stage of this guide for cassava processing into garri.
Because of the hygroscopic nature of garri, it should be packed in airtight and moisture-proof bags.
This is very important especially in areas of high humidity, to prevent mold growth.
Pour the fine Garri into a plastic lining inside a woven polythene sack and store it in a cool dry place.
How do you make garri?
After growing and harvesting fresh cassava, peel the tubers, wash and grate them to produce a mash. Use a porous bag to bag the mash to remove excess water. If you want the yellow garri then add red palm oil and mix thoroughly before bagging.Placed the bag in an adjustable press machine, allow to drain for some hours, and then sift to remove fibrous roots before frying.
What is the English name of garri?
The English name for garri is granulated cassava or cassava granules. You can also call it Coarse-grained cassava.
Does garri expire?
Yes, garri can expire and go bad if you do not store it properly. With proper storage, garri has a shelf-life of six months or more.Make sure to dry the garri properly before storage to preserve it for a long time.
How do you remove cyanide from garri?
The process of making garri follows a series of operations such as grating, draining, fermenting, and roasting. During those stages of processing cassava to garri, about 80 to 95% of cyanide is removed.


who will teach me how to grow me chicken and state gari project
I haven’t started it but I found the article so interesting and simple to follow.more upgrade.
Nice. I look forward to you own result when you apply the steps recommended in this article.
Best wishes.
Very explicable!!!
Thank you. I’m glad you found this cassava processing guide helpful.
Weldone agronomist
more grace
Thank you, Daniel. I’m glad this guide on how to process cassava into garri was helpful to you.
Mr. Chibuzo God bless you sir
Thank you very much.
This is a great write up. God bless this hand
Thanks, a lot.
God bless the innovator of this program, Mr Mbazu Chibuzor, you’ve really done well for humanity, even the lay man can lay hands on it and succeed in the business.
Thanks, for your feedback.
Thank you this information.
You are welcome.
This is a very interesting research and it is informative and very practical.
Additionally, to hasten the fermentation process and achieve desired taste and flavor of gari, one can add an inoculum from a previously fermented gari.
Thanks for sharing this tip.
What the woman say is true, the eba draws well when it has granules. Boil your water, put in a bowl and add your garri, cover it for five minutes to soak before turning it
Thanks for laying emphasis on that, Glory.
Thanks for this teachings
You are welcome, Debbie.
Thanks so much for your help
You’re welcome