How to Grow Squash Plant – The Complete Squash Farming Guide

This squash farming guide explains the step-by-step process of growing edible squashes in your garden.
If you wish to learn how to grow squash, then this manual will expose you to a lot of secrets for a bumper harvest.
Whether you are new to commercial squash farming, or you already own a squash farm, then this guide will help you to increase your yield.
As long as you carefully apply the tips in this article, you will begin to get a better yield from your squash plantation.
What is squash?
Squash, (genus Cucurbita), belongs to a genus of flowering plants in the gourd family (Cucurbitaceae).
It is one of the most delicious vegetables grown throughout the globe.
Even though most people identify squash with vegetables like peppers and tomatoes, from a botanical standpoint, they’re fruits because they contain the seeds of the plant.
It is also a source of good vitamins and has excellent health benefits.
The squash plant produces a vegetable that is large and variable in shape, size, color, and markings.
Many farmers cultivate squash as vegetables and for livestock feed.
Generally, people use the young and tender shoots of squash for cooking purposes.
But, you can cook and serve the fruit of edible squash species as a vegetable.
Also, you can cook and eat the seeds and blossoms.
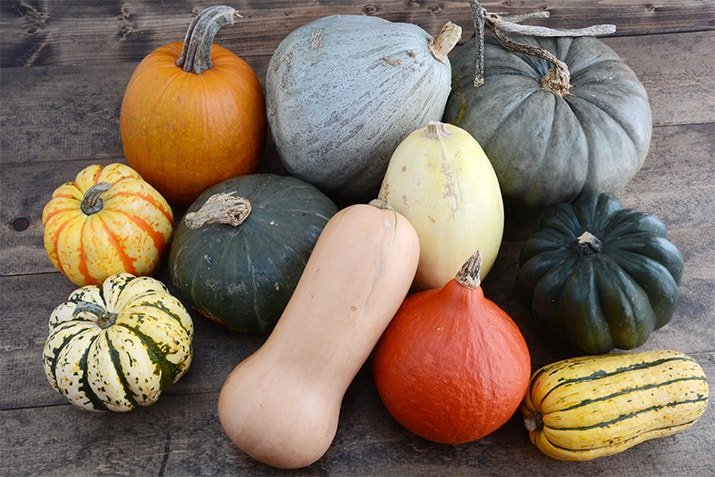
Some of the common names of squash vegetables are winter squash, zucchini (summer squash), butternut, pumpkin, gourd, cushaw, and marrow.
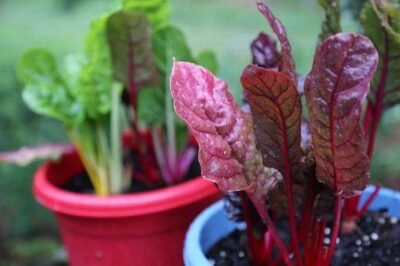
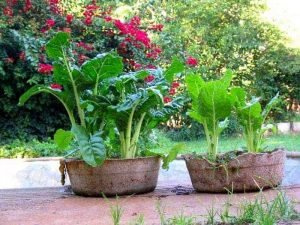
Squash is very easy to grow and you can cultivate them in a greenhouse, poly house, and under a shade net as well.
In addition, you can grow the squash plant in pots, containers, and in your backyards as well.
Types/varieties of squash
There are generally two categories of squash.
The grouping of squash depends on their harvest time and their uses.
The two types of squash are;
- Summer squash
- Winter squash
1. Summer squash

The summer varieties of squash are large and bushy. These types of plants do not spread as the vine types do.
They reach maturity in the summer and are ready for harvest.
Because they’re harvested early, their skin is edible and they have a relatively short shelf life.
Summer squash varieties include zucchini, yellow summer squash, and crookneck squash.
2. Winter squash
Most winter varieties of squash are vine plants and will spread throughout the garden.
Winter squash is often categorized according to fruit size and there are a number of sizes, shapes, and colors available.
They reach maturity in autumn and are ready for harvest.
At this age of harvest, the skin of the squash becomes inedible.
However, this gives them a longer shelf life.
In fact, some varieties are capable of keeping through the winter—hence the name “winter squash”.
Winter squash varieties include pumpkins, butternut squash, spaghetti squash, and acorn squash.
Health benefits of different types of squash
Is squash healthy? You bet!
They come in many different varieties that provide a host of nutritional benefits.
The health benefits of squash range from boosting your immune system and eyesight to guarding against inflammation.
Here are some of the healthiest types of squash and gourds you’ll find in the supermarkets.
1. Health benefits of acorn squash
Acorn Squash is a winter squash that deserves a place on your plate for a few very good reasons.
It is loaded with antioxidants, like carotenoids, which are known to help prevent and fight certain diseases.
Acorn squash is also a great source of immunity-boosting vitamin C, and it is rich in potassium, which helps maintain healthy blood pressure.
2. Why yellow squash is good for you
Yellow squash, also known as summer squash, packs a serious nutritional punch.
It’s one of the healthiest squash available!
Yellow squash contains vitamin A, vitamin C, vitamin B6, folate, magnesium, fiber, riboflavin, phosphorus, potassium, and more.
Yellow squash also contains manganese, a mineral that helps boost bone strength and helps your body process fat and carbs.
3. Zucchini nutritional benefit
Zucchini is a type of squash that is low in calories, carbohydrates, and sugars but high in nutrients and immune-system-boosting antioxidants.
It contains potassium, manganese, vitamin A, and vitamin C, and because of its mild flavor, it goes well with a lot of different recipes.
4. Bitter gourd nutrition
Bitter gourd, also known as bitter melon or bitter squash, has been a recipe in traditional medicines since ancient times.
Modern studies have shown it may be useful for regulating blood sugar, as an antibacterial and antiviral agent and to help lower cholesterol.
But the many benefits of bitter gourd don’t stop there. Bitter gourd is full of antioxidants and nutrients like vitamin A, vitamin C, biotin, and zinc.
5. Nutrition benefits of butternut squash
A single serving of butternut squash packs in 457% of the recommended daily value of vitamin A.
In addition, it is high in vitamin C, potassium, magnesium, vitamin E, and vitamin B-6.
Butternut squash is also low in calories and high in antioxidants, making it a guilt-free addition to your menu.
6. Health benefits of pumpkin
Fiber-rich pumpkin is full of beta-carotene that your body converts to vitamin A, which makes it great for eye health.
It also contains a healthy serving of antioxidants, like lutein and zeaxanthin, and plenty of immunity-boosting vitamin C.
According to scientific tests, pumpkin may also reduce blood glucose levels, boost your body’s tolerance for glucose, and increase insulin production.
7. Nutrition content of spaghetti squash
Spaghetti squash contains antioxidant vitamins like vitamin A, vitamin C, and carotenes, and it offers B-complex vitamins like niacin, vitamin B-6, and folates.
Is squash farming a profitable business

There are lots of crop farming businesses one can venture into, but why invest your money in growing squash?
What you have to understand is that squash farming is relatively cheap and easy to start.
It also has the potential to yield huge profits for you.
You should know that the different types of squash, especially butternut squash, have great market value both in Nigeria and abroad.
This means that investing your money in the squash farming business will guarantee you a huge profit.
You just have to pay attention and carefully follow all instructions here in order to succeed in your crop farming business.
However, this does not substitute the first-hand training from a squash farmer.
As a farmer, you only need a small amount of capital to start cultivating squash.
At least growing squash does not require as much capital as other crops like beans, cowpeas, etc.
The time of maturation of squash is also an advantage.
Squash becomes ready for harvest within three to four months after planting.
This means that you will get your returns on investment within a short period of time.
In addition, the health and nutritional benefits of this vine crop also make it a high-demand crop.
As a result, the demand for squash is very high.
Do you know what comes with high demand for a product?
Yea! Your guess is as good as mine.
More sales and more money will flow to you.
How to grow squash to get a bumper harvest

In order to produce massively from your squash farm, here are the basic steps you need to follow;
Step 1: Conduct a Feasibility Study and Prepare a Business Plan for Squash Farming
For you to excel in any type of farming business, including squash farming, you need to carry out a feasibility study and prepare a business plan.
This is one of the major mistakes most farmers make when starting an agribusiness.
Most farmers begin their agribusiness without carrying out a feasibility study or drafting a business plan.
This is to let you know that every business needs a plan, and squash farming is no exception to this rule.
You need this business plan to guide you in the course of your business investment.
Aside from being your guide, your business plan also improves your chances of assessing loans for the business.
So, you can see that the squash farming business plan is very necessary for the success of your business.
Step 2: Select a Suitable Land with Good Soil for the Cultivation of Squash

After carrying out a feasibility study and drawing up a business plan, the next step is to select your farm location.
- The farm location should be such that is well-drained and also rich in organic matter.
- Also, the planting site needs to receive full sun because squash, like watermelon, is a heat-loving plant.
- Generally, all cucurbits are warm-season crops. They grow best during hot weather and cannot tolerate frost. Seeds will germinate at 15°C (60°F) but germinate best at 29-32°C (85°F-90°F). Pumpkins and squashes grow best at temperatures of 23-29°C (75°F-85°F) day and 15°C-21°C (60°-70°F) night.
- The best pH range that will guarantee a better yield of squash is between 6.0 and 7.5.
So, to be able to adjust the soil to become fit for squash farming, you need to first carry out a soil test.
The result of the soil test will give you an insight into the soil additives that you need to improve the soil.
Step 3: Land Preparation: Prepare the Soil for Planting Squash
Now that you are done selecting the best soil for cultivating squash, you need to prepare the soil for seed planting.
- Soil preparation for growing squash begins with the clearing of thick vegetation on the farm site.
- You also need to remove all rocks and trash from the soil.
- After that, work up the soil and incorporate compost into the soil as well as organic manure. This is because squash is a heavy feeder and will suck up a lot of nutrients in the soil.
- The essence of adding manure to the soil before planting is to get a rich soil base for the squash plant.
- When you are done tilling the soil, leave it for some weeks before planting.
- To know whether the soil is ready for planting squash, the soil will be dry enough not to stick to garden tools.
Step 4: Select Viable Squash Seeds for Planting

Squash is one of the fastest-growing crops you can have in your garden and it also has a wide range of cultivars you can choose from.
All squash falls into one of two categories: summer squash or winter squash.
Also, squash varieties can be either open-pollinated or hybrids.
However, open-pollinated varieties generally are not used in commercial squash production.
The open-pollinated variety of squash is usually less expensive and widely available.
But the hybrids are more uniform and often higher yielding.
Here are some examples of viable squash seeds for planting;
- Yellow crookneck types include ‘Dixie,’ ‘Medallion,’ ‘Supersett1,’ ‘Prelude II2,’ and ‘Destiny III2.’
- Yellow straight neck types include ‘Early Prolific,’ ‘Lemondrop L,’ ‘Goldbar,’ and ‘Multpik1.’
- Zucchini squash types include ‘Senator,’ ‘Elite,’ ‘Seneca,’ and ‘Tigress.’
- Acorn squash includes ‘Seneca Autumn Queen (bush),’ ‘Early Acorn (bush),’ and ‘Royal Acorn (vine).’
New varieties are constantly being developed as a result of research and development.
So, you need to always check with seed salespeople and your local county Extension agent for the latest information on new varieties.
Step 5: Irrigate the Squash Farm

When the weather is dry, you need to irrigate the squash farmland to prevent the plants from dying.
It is better to use trickle or furrow irrigation than sprinkler irrigation as any moisture on the leaves increases the incidence of leaf disease.
A major requirement for irrigation is for you to have a source of water (borehole, flowing stream, well, etc.)
For all types of squash, frequent and consistent watering is important for good fruit development.
When fruits form, water the squash farm diligently throughout their growth period.
Water deeply once a week, applying at least one inch of water.
Also, do not water shallowly; the soil needs to be moist 4 inches down.
Step 6: Plant the Squash Seeds in the Soil
After you have properly set the irrigation channels for the squash plant, it’s time to place the seeds in the soil.
Here is how to plant squash seeds in the soil and the correct spacing requirement

- Plant the squash seeds about 1 inch deep and 2 to 3 feet apart in a traditional garden bed.
- Alternatively, plant as a “hill” of 3 or 4 seeds sown close together on a small mound. This method of planting squash is helpful in northern climates, as the soil is warmer off the ground.
- The plant spacing should be about 4 to 6 feet between hills.
- Mind you, winter squash, which produces longer vines, needs at least 4 feet between mounds, but 6 feet is better.
- Consider adding black plastic mulch, as this will keep weeds away while promoting soil warmth and water conservation.
- Make sure to water the plants 1 to 2 inches (3-5 cm.) each week using drip irrigation.
- If you are planting in your garden, water gently with a watering can or gentle spray of a hose immediately after planting.
How long does it take squash seeds to germinate?
It takes about 7 to 10 days for squash seeds to germinate at a temperature of 85°F (29°C) or warmer.
- If you stay in frosty areas and wish to start seeds indoors due to a short gardening season, sow 2 to 4 weeks before your last spring frost in peat pots.
- When transplanting, be very gentle with the roots and only transplant when the soil temperature is at least 70°F (21°C).
- To get an early start when soil temperatures are not yet ideal, warm the soil with black plastic mulch.
- In fact, waiting to plant a few seeds in midsummer will help avoid problems from squash vine borers. It will also prevent other pests and diseases that are common earlier in the season.
Step 7: Stake The Squash Plant Using Trellis
Note that you may not need to grow squash vertically trellis as it is in cucumber farming.
The reason is that climbing squash varieties will grow just fine along the ground without any support, and many gardeners grow them that way.
However, most vining squashes grow very large and can take over the garden pretty quickly.
Also, if you don’t have enough space in your garden, then growing squashes upwards is the obvious answer.
The easiest way to grow squash vertically is to train them to grow on a climbing structure like a trellis for instance.
You may secure a simple one-piece trellis against a sun-facing wall or strong fence so that the plant can crawl up.
Plant your squashes the same distance apart that they would grow if left at ground level.
As the vines grow, provide support by fastening a taut twine between the trellis and the ground with stakes for the tender vines to climb around.
The best varieties for squash trellising are delicata, acorn, zucchini, and yellow summer.
Smaller squashes and gourds do well on a trellis, but winter squash, like turban and butternut, can become too heavy and large for a successful vertical garden without additional support
Step 8: Prune the Squash Plants

Firstly, you may want to ask whether it is okay to prune your squash vine.
Well, when it comes to squash vines, yes, you can prune them.
However, you do not have to in order to ensure they remain healthy; it is simply a matter of preference.
If they are beginning to take over everything as they climb different paths, then pruning may be the right choice for you.
However, keep in mind that once you begin snipping away at the vines, you might reduce your harvest.
Also, squash doesn’t usually require pruning except to harvest flowers or remove dead or diseased blossoms and leaves.
You have to weigh the pros and the cons and go from there.
It usually doesn’t harm the plant to prune if you need to because you may want to cut them back for space reasons.
Steps to follow to prune squash vines properly
So, if you desire to prune your squash vines, here are the steps to follow;
- Prune squash plants when they are near maturity, around six to eight weeks into the growing season.
- Be certain that the weather is above 60 degrees and that the final frost of spring has passed.
- Cut back each squash vine so that only two or three buds per vine remain.
- Use a sharp pruning knife or gardening shears to cut the excess vine away at a leaf joint.
- Try to make each cut diagonally to help protect the exposed vine end from diseases.
- Look over each squash plant and remove any dead or diseased leaves or blossoms you notice by pinching them off at the base.
- Learn to tell male squash blossoms from female blossoms. Male flowers are quite thin and will never fruit, while female flowers are wider and will appear swollen at the base at maturity; this swelling is the beginning of a squash fruit. When you see the bases of the female blossoms swell, pinch off ½ to 2/3 of the male flowers to encourage the squash vine to produce more females while still leaving enough male blossoms to fertilize the new females and enable them to fruit.
- Remove squash as soon as they are fully ripe. This will prevent the squash from rotting or being eaten by wildlife and may prompt the squash vines to cycle again within a single season.
Step 9: Control and Prevention of Squash Pests
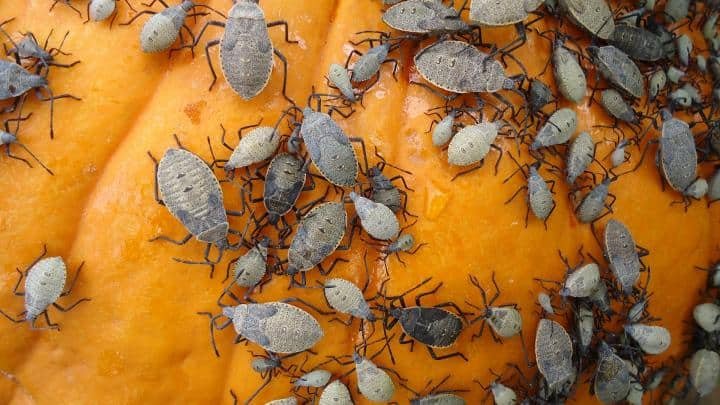
Squash bugs and squash vine borers are the two major pests among cucurbits.
- Early detection is critical! You want to catch squash bugs before they grow into adults or they are very difficult to get rid of completely.
- Pick egg masses off the plants in the morning and later in the day. One reader fills a vase with water and liquid dish soap and flicks the squash bugs into the water. Once the bugs are dead, it’s OK to dump the water anywhere. You can also simply scrape the eggs off the leaves with a butter knife and let them fall onto the ground, where beetles will eat them. Eggs hatch in about ten days, so be sure to check for them on at least a weekly basis.
- Place a board or shingle in the garden at night. During the night, both adults and nymphs will congregate underneath the board. Squash between two hard surfaces in the morning and dispose of them.
- Insecticides (such as carbaryl/Sevin) are most effective if applied when eggs are hatching. See your local garden center or cooperative extension service for controls that are locally approved.
- Keep checking your plants, at least daily. If there are no more than a few vines infected, keep collecting and destroying the bugs and crushing the egg clusters that you find on the undersides of leaves.
HOW TO PREVENT SQUASH BUGS
- Prevention is key: In the fall, be sure to burn or compost old squash vines to rid your garden of any possible shelters for breeding and over-wintering.
- Avoid deep, cool mulches like straw or hay that provide an environment that these bugs seem to love.
- Practice crop rotation.
- Consider keeping vines covered until blossoming begins. Remove the cover for pollination needs. There is only one generation of squash bugs per year, and you can avoid them by covering your plants for the first month of spring. You can also delay planting your squash until the early months of summer.
- Companion planting can be useful in repelling squash bugs. Try planting nasturtium and tansy around your plants that are commonly affected by squash bugs.
- Select varieties of squash that are resistant to the squash bug if you have a big problem. ‘Butternut’, ‘Royal Acorn’, and ‘Sweet Cheese’ varieties are all more resistant to squash bugs.
Step 10: Harvest the Squash and Store it Properly

HOW TO HARVEST SUMMER SQUASH VARIETY
- Harvest summer squash when small and tender for the best flavor. You may harvest as “baby squash” or when mature (6 to 8 inches long). Large squash has very little taste.
- Most varieties average 60 days to maturity and are ready as soon as a week after flowering. (Check the seed packet for more exact information.)
- Check plants every day for new produce. Once squash starts producing, you’ll be picking every day!
- Cut the fruit off the vine rather than breaking them off. Leave at least an inch of stem on the fruit. Use a sharp knife.
- Should you miss a picking or two, remove the overripe squash as soon as possible to reduce demands on the plants for moisture and nutrients.
- Summer squash is very susceptible to frost and heat damage, so you do want to pick them all before the first fall frosts arrive.
- Fresh summer squash can be stored in the refrigerator for up to ten days.
HOW TO HARVEST WINTER SQUASH VARIETY
- Harvest winter squash when the rind is hard and deep in color, usually late September through October.
- Winter squash can be stored in a cool, dark place until needed. Many varieties will last for most of the winter (except for acorn squash, which does not keep for more than a few weeks). If you have a cool bedroom, stashing them under the bed works well. They like a temperature of about 50 to 65°F (10 to 18°C).
- Pull up the vines and compost them after you’ve picked everything or after a frost has killed them. Then, till the soil to stir up the insects a bit.
For further reading, check out these resources below
- How to Identify and Get Rid of Squash Bugs
- Planting, Growing, and Harvesting Summer and Winter Squash
- Commercial Squash Production
- Tips For Growing Squash
- Tips On Growing Spaghetti Squash
- 16 Types of Squash and Everything You Need to Know About Them
If this article was helpful for you, please click on the social media icon on your screen to broadcast this.
I love to get your feedback too, so leave a comment below, and let’s discuss.